

How to Avoid Wrist Injuries in Boxing: 7 Essential Steps

Table of Contents
Why Wrist Injuries Happen in Boxing and How to Spot the Warning Signs
How to Wrap Hands for Boxing: A Step-by-Step Wrist Support Guide
Choosing Boxing Gloves with Adequate Padding and Wrist Support
What to check before you buy
How to size and fit gloves
When to replace gloves
Boxing Punching Technique: Wrist Alignment for Every Punch
Safe Heavy Bag and Pad Training: Intensity Progression for Beginners
Boxing Wrist Strengthening Exercises and Warm-Ups
Warm-up before every session (5-10 minutes)
Strengthening progression
Cautions
Wrist Sprain Recovery and Return-to-Training Guidance
Frequently Asked Questions
Last Updated: October 20, 2026
Why Wrist Injuries Happen in Boxing and How to Spot the Warning Signs
Learning how to avoid wrist injuries in boxing starts with understanding why they happen. The wrist is a stack of small bones held together by ligaments, and it was never built to absorb repeated force from a 16-ounce glove landing at full speed.
Most wrist pain in boxing comes from four causes:
Poor wrist alignment at the moment of impact
Insufficient hand wrapping that leaves the wrist unsupported
Too much punching volume before the joint adapts
Wrist sprain is the most common injury. Ligaments stretch beyond their limit, and you get swelling, bruising, and pain on the outside of the wrist. A fracture is rarer but more serious, usually from a single hard shot with a bent wrist.
Here is how to tell routine soreness from a real injury:
Sign | Routine Soreness | Possible Injury |
Timing | Fades within a day | Lasts 48-72 hours or longer |
Location | Dull, spread across muscles | Sharp, pinpointed at the joint |
Swelling | None | Visible swelling or bruising |
Movement | Full range returns | Pain when rotating or bearing weight |
Strength | Normal grip | Weak grip, dropping objects |
Watch Out Ignoring sharp wrist pain and "punching through it" is the fastest way to turn a minor sprain into weeks out of training. If pain is sharp, pinpointed, or comes with swelling, stop punching and get a medical assessment.
How to Wrap Hands for Boxing: A Step-by-Step Wrist Support Guide
Hand wraps are the first line of wrist support in boxing. A proper wrap stabilizes the wrist joint, locks the knuckles together, and cushions the impact zone.

Follow these steps for a secure wrap:
Start at the wrist. Anchor the thumb loop and wrap around the wrist 3 times, snug but not tight.
Cover the back of the hand. Wrap diagonally across the hand toward the pinky side.
Lock the knuckles. Wrap around the knuckles 3-4 times, keeping fingers spread.
Support the thumb. Loop around the thumb once, then return to the wrist.
Finish at the wrist. Wrap 2-3 more times and secure the closure.
How tight should hand wraps be? Tight enough that the wrist feels supported but loose enough that you can still make a full fist. If your fingers tingle or go numb, the wrap is too tight and needs to come off.
Pro Tip Check your wrap before every round. A wrap that loosens mid-session stops supporting the wrist, and most wrist injuries happen in the later rounds when the wrap has shifted.
Choosing Boxing Gloves with Adequate Padding and Wrist Support
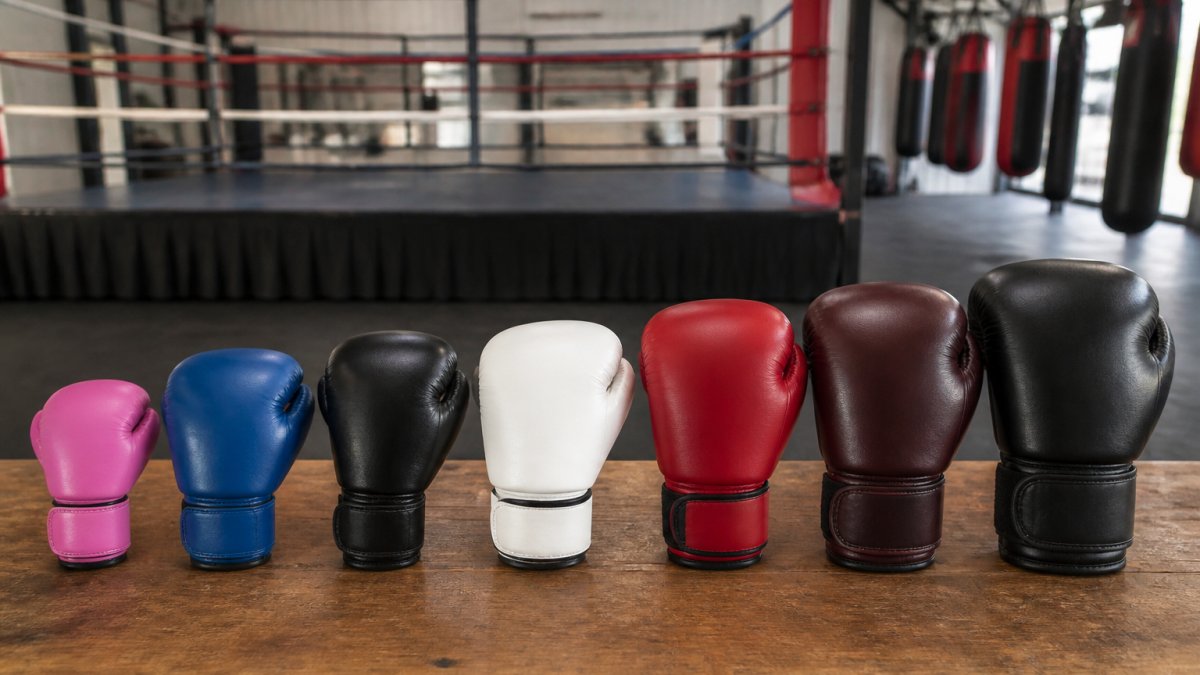
The right gloves protect the wrist as much as the knuckles. A glove only stabilizes the wrist if the cuff is long enough, the closure is tight enough, and the hand cannot slide inside. Most wrist injuries from equipment come from three failures: a short cuff that lets the wrist bend, a loose closure that lets the hand rotate, and compressed padding that transfers force straight into the joint.
Katalin Rodriguez-Ogren
What to check before you buy
Cuff length. The cuff should extend past the wrist bone and stay rigid when you squeeze it. A short cuff leaves the wrist exposed to bending on impact.
Closure type. Lace-up gloves give the most wrist support because the laces lock the cuff to the forearm. Hook-and-loop straps are easier for beginners but only work if you pull them tight enough that the cuff does not shift.
Padding condition. Worn, compressed foam transfers force straight to your hand. Replace gloves when the knuckle padding feels flat or you can feel the bag through the glove.
How to size and fit gloves
Glove size is listed in ounces, and the right weight depends on body weight and training type. A common starting point for adults training on bags and pads:
Body weight | Bag and pad work | Sparring |
Under 120 lb | 10-12 oz | 12-14 oz |
120-150 lb | 12-14 oz | 14-16 oz |
150-180 lb | 14-16 oz | 16 oz |
Over 180 lb | 16 oz | 16 oz or heavier |
These are starting points, not rules. Hand size matters as much as body weight: a person with large hands may need to size up even at a lower body weight, and a person with small hands may need to size down to keep the hand from sliding.
The fit test: Put the glove on with your wraps on. Make a fist and press the knuckles against a wall. Your wrist should stay straight and the cuff should not gap away from your forearm.
When to replace gloves
Gloves do not last forever. A common pattern is that bag gloves lose knuckle padding before the shell wears out, so the glove looks fine but no longer protects. Check the padding every few months by pressing your thumb into the knuckle area: if it bottoms out easily, replace the gloves. Keeping a separate pair for bag work and sparring also extends the life of both.
Pro Tip Bring your wraps to the fitting. A glove that fits bare-handed will be too tight with wraps on, and a glove that fits over wraps is the only fit that matters.
Boxing Punching Technique: Wrist Alignment for Every Punch
Correct punching technique keeps the wrist straight and the knuckles aligned with the forearm. A bent wrist under load is the single biggest cause of wrist injury in boxing.
Here is the wrist check for each punch:
Jab: Fist tight at the moment of impact, wrist straight in line with the forearm, knuckles leading.
Cross: Rotate the rear hip and shoulder, but keep the wrist locked. Do not let the fist drop at the end.
Hook punch: Keep the wrist rigid and the elbow at 90 degrees. A loose wrist on hooks causes the most sprains.
The knuckle protection rule is simple: land on the first two knuckles, never on the pinky side. Landing on the outside of the fist rolls the wrist and strains the ligaments.
Key Takeaway A tight fist with a straight wrist turns your arm into one solid unit. A loose fist with a bent wrist turns your hand into a lever that snaps at the joint.
Safe Heavy Bag and Pad Training: Intensity Progression for Beginners
Beginners should build punching volume slowly over several weeks. The heavy bag does not move away from your punch, so every shot returns force into your hand and wrist.
A sensible progression looks like this:
Weeks 1-2: Light technique work, 3 rounds of 2 minutes at half power.
Weeks 3-4: Add power gradually, still stopping if form breaks.
Weeks 5-6: Full 3-minute rounds at moderate power.
Week 7 onward: Increase intensity only when the wrist feels stable through a full session.
On focus pads, the holder matters as much as the puncher. A partner who pushes into your punch or holds pads too close forces your wrist to bend. Tell your pad holder to meet your punch, not fight it.
Watch Out Hitting a heavy bag with no wraps and thin gloves is a classic beginner mistake. The bag always wins that exchange.
Boxing Wrist Strengthening Exercises and Warm-Ups
Wrist and forearm strength is built through consistent, low-impact conditioning, not through heavy loading right before you punch. Strong forearms and stable wrists handle punching force better than weak ones, but the adaptation takes weeks. Add conditioning 2-3 times per week on non-consecutive days, and keep it separate from hard bag work so fatigue does not carry into punching.
Warm-up before every session (5-10 minutes)
A cold wrist cannot lock straight at impact, so warm up before you wrap and glove up:
Wrist circles, 10 each direction
Wrist flexion and extension stretches, 20 seconds each
Light shadowboxing to warm the shoulders and hands
Strengthening progression
The mistake most beginners make is starting with too much resistance. Begin with light loads and add resistance only when the current load feels easy through all sets. A sensible progression:
Weeks 1-2: Bodyweight and range-of-motion work only. Wrist circles, rice bucket digs, and light grip squeezes.
Weeks 3-4: Add light dumbbell wrist curls, 2 sets of 15 in each direction, palm up and palm down.
Weeks 5-6: Add grip work with a hand gripper, 3 sets of 10 each hand, and knuckle push-ups on a padded surface, 2 sets of 8.
Week 7 onward: Increase resistance gradually only if the wrist feels stable through full training sessions.
Exercise notes:
Wrist curls: Light dumbbell, 2 sets of 15, palm up and palm down. Keep the forearm supported on a bench so the wrist does the work.
Grip squeezes: Hand gripper, 3 sets of 10 each hand. Squeeze slowly and release slowly; do not bounce.
Rice bucket digs: Push and twist hands through rice for 60 seconds. This builds endurance in the small muscles that stabilize the wrist.
Wrist mobility work matters too. A stiff wrist cannot lock straight at impact, so stretch after training when the muscles are warm. Rotate the wrist through its full range, hold each stretch 20-30 seconds, and never force a painful end range.
Cautions
Stop any exercise that causes sharp pain, tingling, or numbness in the fingers. Those symptoms can signal nerve irritation, and pushing through them is how a minor issue becomes a long layoff. If a wrist feels unstable during conditioning, back off the load and mention it to a coach before your next session.
Key Takeaway Conditioning builds a stronger wrist over weeks, not days. Progress the load slowly, keep the wrist straight during every exercise, and treat sharp pain as a stop signal rather than a challenge.
Wrist Sprain Recovery and Return-to-Training Guidance
Wrist sprain recovery follows a simple rule: rest first, rebuild second, punch last. Most mild sprains settle with rest, ice, and gentle movement, but rushing back too soon re-injures the joint.
First 48-72 hours:
Rest the wrist and stop all punching
Apply ice for 15-20 minutes, every 2-3 hours
Keep the hand elevated to reduce swelling
Avoid heavy gripping or lifting
After the acute phase: Start gentle wrist mobility work and light grip exercises. Pain should guide you. If a movement hurts, back off.
Return to training in stages:
Stage | Activity | Pain Rule |
1 | Range-of-motion and grip work | No pain during movement |
2 | Shadowboxing, no impact | No pain at full extension |
3 | Light bag work with wraps | Stop at any sharp pain |
4 | Full rounds, moderate power | Wrist stable through the session |
See a doctor if pain is severe, swelling does not improve within a few days, or you cannot bear weight on the hand.
Wrist injuries in boxing are preventable, but only with the right habits from day one. Proper wrapping, well-fitted gloves, straight-wrist technique, and a patient progression plan protect your hands for the long run.
Frequently Asked Questions
Can boxing cause wrist pain?
Yes, boxing can cause wrist pain, especially when punches land with poor wrist alignment or when gloves and wraps don't provide enough support. The repetitive impact of hitting heavy bags and focus pads stresses the wrist joint. Beginners often feel soreness after early sessions, but sharp pain during or after punching is a sign to stop and assess. Proper technique, quality equipment, and gradual intensity increases are key to preventing wrist injuries in boxing.
How do I know if my wrist sprain is grade 1 or 2?
A grade 1 wrist sprain involves mild stretching of ligaments with minor pain and swelling, and you can usually still move the wrist with discomfort. A grade 2 sprain means partial ligament tears, causing more swelling, bruising, and limited range of motion. If you have significant swelling, can't bear weight on the hand, or pain persists beyond a few days, see a doctor for an accurate diagnosis. Self-assessment is not reliable for grades, so a medical professional should evaluate any moderate to severe wrist sprain.
What is the fastest way to cure wrist pain?
For a mild wrist sprain, start with rest, ice application for 15-20 minutes every 2-3 hours during the first 48-72 hours, and gentle compression. Avoid punching until pain subsides. Once acute pain decreases, begin wrist mobility and strengthening exercises gradually. If pain is severe or doesn't improve within a week, seek medical assessment. There's no instant cure; recovery takes time, and rushing back to training can worsen the injury and extend your time off.
Should you keep boxing if your wrist hurts?
No, you should not keep boxing through wrist pain. Continuing to punch with an injured wrist can turn a minor sprain into a chronic problem or cause a fracture. Stop training, apply ice, and rest the wrist. If pain is mild, you can stay active with footwork, shadow boxing without impact, or conditioning that doesn't involve the wrist. Return to punching only when pain is gone and you've strengthened the wrist. A qualified coach can help you modify training while you recover.
START TRAINING TODAY

Comments